Installing the subscription widget for the Recharge Checkout on Shopify manually
Learn how to install the subscription widget for stores using the Recharge Checkout on Shopify.
You may need to perform the Recharge Checkout on Shopify installation manually depending on the custom code installed for the store.
This guide outlines the steps to installing the Recharge Checkout on Shopify manually.
Platform
- Recharge Checkout on Shopify
Before you start
- The Recharge support team can install the correct code for you when you update your theme. The following guide is for reference if there is custom code installed and the installation must be performed manually.
- Stores using the Recharge Checkout on Shopify do not have support for Online Store 2.0 themes out of the box and will require additional code customizations to integrate Recharge with these themes. This type of customization is not supported as per the Recharge Scope of Support.
- You may also consider converting to the Shopify Checkout Integration if you would like to use a Shopify 2.0 theme for the best experience long-term.
- This guide requires basic knowledge of HTML and Shopify Liquid, as well as the use of the Shopify Theme editor. The Recharge support team does not support custom coding as per the Recharge Scope of Support.
- You need to access your Shopify theme editor to install the Recharge integration manually.
- You cannot install Recharge on theme trials, only on free or paid themes.
Step 1 - Add the Recharge include to the product page
- Access the theme file that contains the product form. Depending on your Shopify theme, this is either the
product.liquid,product-form.liquid,orproduct-detail.liquidfiles.- On occasion, the file name may be listed as something different. If you do not see one of the options above and are unsure where to find the product form, contact the theme developer for support.
- From the correct theme file, look for the
formtag with an action attribute set to/cart/add. - Add the Recharge include to the product page using Liquid code or HTML code, depending on your theme.
- If using Liquid code, you will see:
{% form 'product', product, class: productClasses %} - If using HTML, you will see:
<form id="add-item-form" action="/cart/add" method="post"><br>
- If using Liquid code, you will see:
- On the line below the form tag, paste the following code:
{% if product.available %}{% include 'subscription-product' %}{% endif %}
NoteSome store themes use "render" instead of "include". Examples of themes that require this are Prestige, Turbo, Express, and Warehouse.
Your theme file should now include both lines of code.
Liquid example:

HTML example:

Step 2 - Add data-productid="{{product.id}}" to form on product page
Step 1 - Update the form tag
Liquid code
Add the code data-productid: product.id inside the form tag.
Example:
{% form 'product', product, data-productid: product.id, class: productClasses %}
HTML code
Add data-productid="{{product.id}}" inside the formtag.
Example:
<form id="add-item-form" action="/cart/add" method="post" data-productid="{{product.id}}">
Step 2 - Update the select/input
In the same product.liquid theme file, look for aninput or a select with the attribute name="id". Your theme may only have one version, however, some themes include a few.
Example input:
<input type="hidden" name="id" value="{{ product.variants.first.id }}" /> For every instance of a select or input that you find, add data-productid="{{product.id}}"
Example select:
<select id="product-select-{{ product.id }}" name='id'><br>
When updating an input, add data-productid="{{product.id}}" after name='id':
<input type="hidden" name='id' value="{{ product.variants.first.id }}" data-productid="{{product.id}}" /><br>
If updating a select, add the new piece of code after name='id':
<select id="product-select-{{ product.id }}" name='id' data-productid="{{product.id}}"><br>
NoteThere are rare times when a theme may have the HTML element containing the product variants appear in other files. For example, the Fastlane theme must also have additional theme files updated.
Step 3 - Add the Recharge include to the cart page
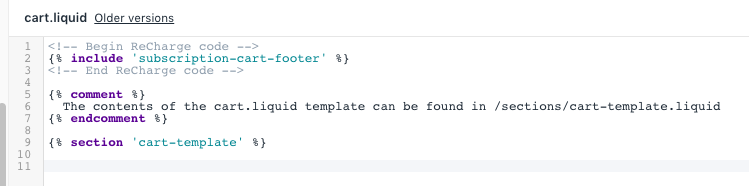
Step 1 - Update the cart.liquid theme fil
cart.liquid theme fil- Access the
cart.liquidtheme file. At the top of the file, paste in the following code:<!-- Begin Recharge code --> {% include 'subscription-cart-footer' %} <!-- End Recharge code -->
Step 2 - Hide the dynamic checkout buttons
Hide any dynamic checkout buttons on the cart page if you are utilizing them. Dynamic checkout buttons, such as the Buy it now button, redirect away from the Recharge checkout.
Instead, you can use PayPal with Braintree to offer PayPal as a payment option at the checkout if the customer checks out with a subscription product.
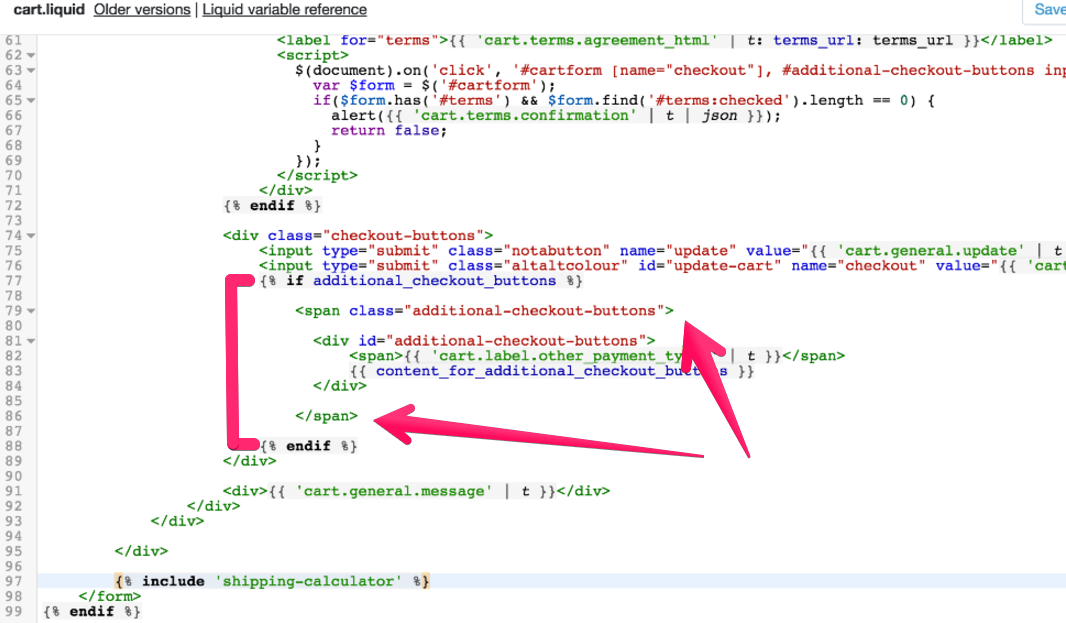
To hide these checkout options:
- Locate the additional checkout buttons
IFstatement from thecart.liquidfile. - Add one tag with the
attribute class = "additional-checkout-buttons". - Add <
span class="additional-checkout-buttons">underneath the initialIFstatement. - Close the tag by adding
</span>before{% endif %}.
NoteYour cart may display line item properties under the product title. Review Hiding properties on the cart page to hide the line item properties.
Step 4 - Add the Recharge include to the theme.liquid
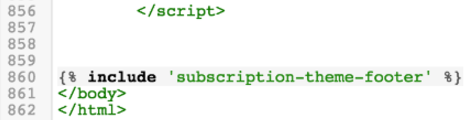
- Open your theme.liquid file and go to the bottom of the page.
- Right above the closing body tag, paste this line:
{% include 'subscription-theme-footer' %}
NoteSome store themes use
renderinstead ofinclude. Examples of themes that require this are Prestige, Turbo, Express, and Warehouse.
Step 5 - Add the Recharge code to customers/account.liquid
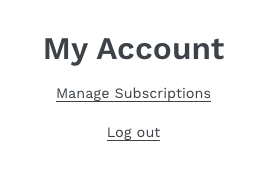
To ensure customers can manage their subscriptions from their Shopify profiles, add the Recharge customer portal link to the customers/account.liquid file.
This link is visible for customers who purchased a subscription product and provides customers with a link that says Manage subscriptions.
- Open the Shopify Theme editor and select the customer template called
account.liquid. - Add the following code to display the Manage Subscriptions option:
<!-- Begin Recharge code -->
<p><a href="/tools/recurring/login/">Manage Subscriptions</a></p>
<!-- End Recharge code -->

Step 6 - Test the intergration
Add a product to a new or existing order to test the integration and confirm it is installed properly. You can come back later to add any additional products.
Step 7 - Preview the app on your store
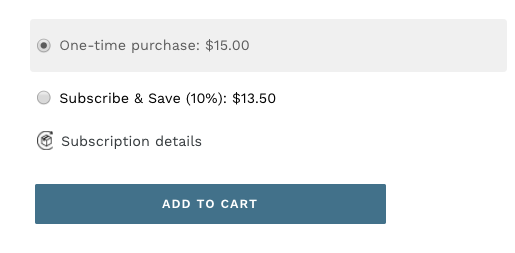
Open the subscription product on your storefront to preview the manual integration. If you have not enabled your subscription widget, modify the product page URL to contain ?recharge=true1 at the end, eg. https://www.yourstorename.myshopify.com/products/product?recharge=true.
If installed correctly, the subscription widget should display on the product page.
TipConsider running a test transaction before going live.
Troubleshooting
See Troubleshooting the subscription widget if you experience any issues after completing the manual installation.
Updated 4 months ago