Custom coding the Gift subscriptions widget for Shopify 2.0 themes
Shopify 2.0 themes typically use drag-and-drop app blocks, where you can drop the Recharge gifting widget onto the product page when configuring your theme in Shopify. You can custom code the widget into your theme if you cannot access the App Block, which happens occasionally for themes that have been customized.
This guide is only needed for heavily customized themes where the gifting widget must be hardcoded.
Platform:
- Shopify Checkout Integration
- Migrated Shopify Checkout Integration
Before you start
Note:Adding the Gift widget to your theme code is only necessary if you cannot access the App Block for your theme. Try accessing the Recharge gifting widget before following the instructions in this guide.
- View your Shopify theme code and check that you have a file called product.json to confirm that you are using a 2.0 theme. The product.json file only exists in Shopify 2.0 themes. Review Using Gift subscriptions with Shopify 1.0 themes 1.0 if your store is using a 1.0 theme.
- This guide requires custom code and is not supported by Recharge as per the design and integration policy. If you require further assistance, work with a third-party developer.
Update your Shopify theme
Add the gift widget to the main-product.liquid file to hardcode the widget into your theme. Note that your theme may use a different name for the liquid file containing your product page info.
-
Log in to your Shopify admin and select Online Store from the navigation menu. Choose Themes from the list of nested menu items.
-
Select ... next to the theme you wish to update. Select Edit code from the menu options displayed.
-
Search for the
main-product.liquidfile located under Sections. -
Locate the section where your product details are displayed.
-
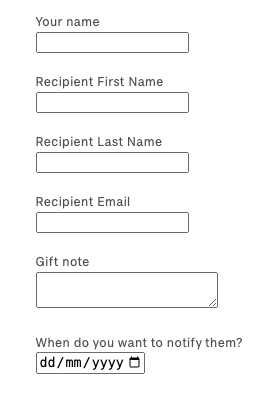
Add the following code block. This code is configured to only show the widget on products with the word gift in their titles. Ensure that you name your products accordingly or modify the condition to match your criteria:
{% if product.title contains 'Gift' %} <form id="gift_form"> <label for="gift_recipient_first_name">Recipient first name</label> <input id="gift_recipient_first_name" type="text" name="properties[__rc_gift_recipient_first_name]" required maxlength="50" pattern=".*\S+.*" /> <label for="gift_recipient_last_name">Recipient last name</label> <input id="gift_recipient_last_name" type="text" name="properties[__rc_gift_recipient_last_name]" required maxlength="50" pattern=".*\S+.*" /> <label for="gift_recipient_email">Recipient email</label> <input id="gift_recipient_email" type="email" name="properties[__rc_gift_recipient_email]" required maxlength="320" /> <label for="gift_message">Gift message</label> <textarea id="gift_message" name="properties[__rc_gift_recipient_note]" rows="3" maxlength="200" ></textarea> <label for="gift_sender_name">Sender name</label> <input id="gift_sender_name" type="text" name="properties[__rc_gift_sender_name]" maxlength="50" /> <label for="gift_notification_scheduled_at">Send gift on</label> <input id="gift_notification_scheduled_at" type="date" name="properties[__rc_gift_notification_scheduled_at]" /> </form> {% endif %} -
Use
minandmaxvalues in JavaScript to keep the date picker dynamic. This ensures that the Send gift on date is always valid based on the current date and your defined maximum months in the future. -
Save your code changes.
WarningAvoid nested or separate forms (ie. use
<form id="product_form">instead of<form id="gift_form">to avoid errors with validation, and the submit process. To ensure the validation works use a single form for the entire page, or just for the area where you included the code above.
The code displays the standard gift subscription without any styling. Apply inline styling or use a stylesheet to match the widget style to your theme.
NoteBy default Recharge deliberately hides the product's gift properties on the customer's cart page. You can remove the underscore from them proerties in the code so that they are visible in the cart (e.g., change
properties[__rc_gift_recipient_first_name]toproperties[rc_gift_recipient_first_name]).
Trigger validation
Use JavaScript to trigger validation methods:
checkValidity(): Checks whether the form is valid but does not display messages.reportValidity(): Checks validity and displays native browser validation messages
Test the widget
Try checking out with a gift product to confirm that the widget works as intended. Confirm that the rc_gift_properties are attached to the product correctly.
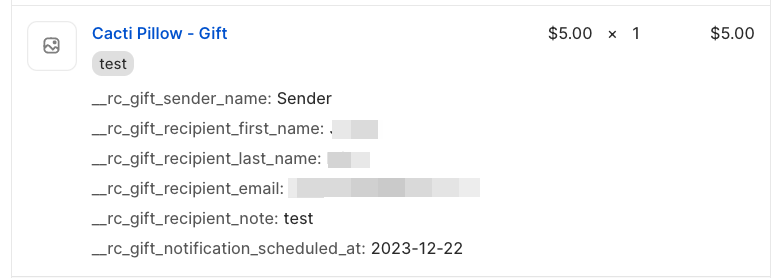
After completing your test order access the recipient's customer account in Recharge to view the unredeemed gifts, to test the full redemption flow.
Updated about 1 year ago